> ## Documentation Index
> Fetch the complete documentation index at: https://docs.artaios.ai/llms.txt
> Use this file to discover all available pages before exploring further.
# Prompt Management
> Create and organize your reusable prompts
The Prompts section lets you create, organize, and manage your own reusable prompts. Build your personal library of prompts that you can quickly insert into agents without rewriting them each time.
**Looking for prompt configuration details?** This guide covers managing prompts in the UI. For YAML configuration, prompt templates, variables, and advanced features, see the [Prompt Configuration](/documentation/agent_config/types_config/prompt-configuration) reference.
 ## Interface Overview
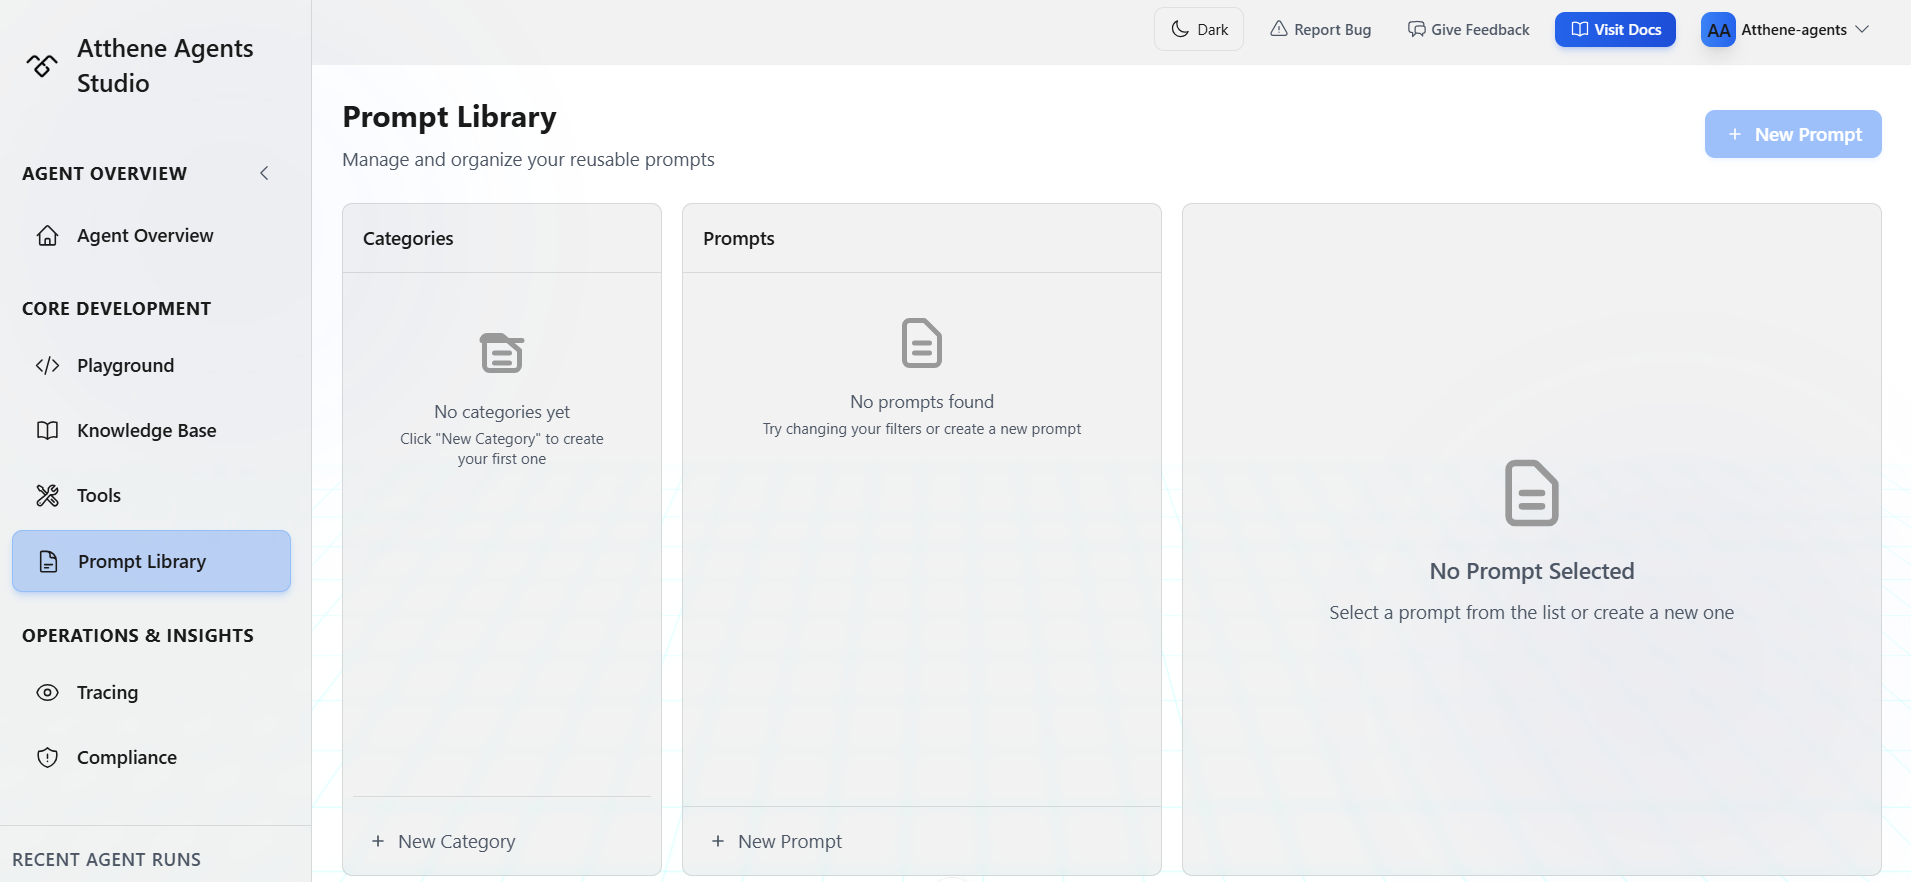
The Prompts page has three panels:
### Left: Categories
Organize your prompts into categories:
* Create custom categories
* Filter prompts by category
## Interface Overview
The Prompts page has three panels:
### Left: Categories
Organize your prompts into categories:
* Create custom categories
* Filter prompts by category
 ### Middle: Prompt List
View all prompts in the selected category
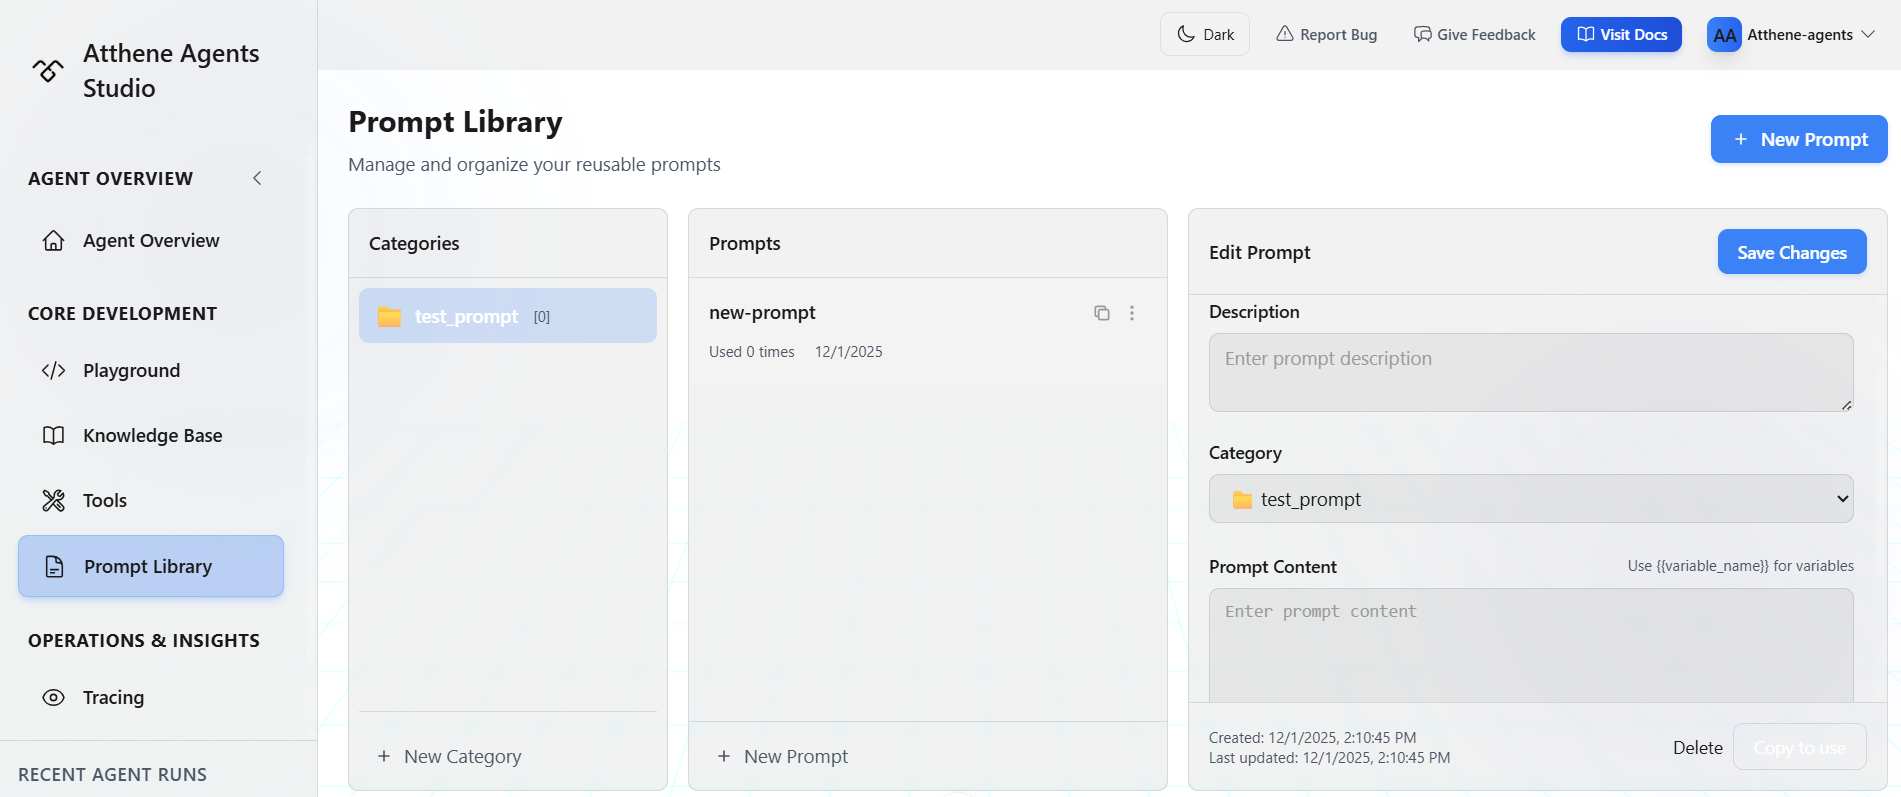
### Right: Prompt Editor
Create and edit prompt content:
* Write your prompt text
* Add metadata
* Save and manage versions
### Middle: Prompt List
View all prompts in the selected category
### Right: Prompt Editor
Create and edit prompt content:
* Write your prompt text
* Add metadata
* Save and manage versions
 ## Creating Your First Prompt
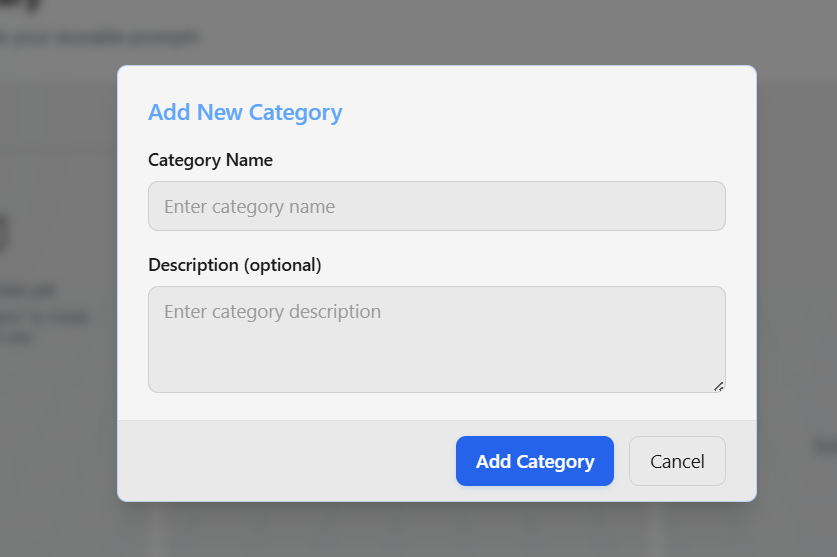
Click **Add Category** in the categories sidebar
Give it a name like "Customer Support" or "Data Extraction"
Click **New Prompt** button at the top
This creates a new prompt in the selected category
In the editor panel:
* Give it a descriptive name
* Write the prompt text
* Add any notes or examples
Click **Save** to add it to your library
## Using Prompts in Your Agents
Reference saved prompts in your agent YAML using template variable syntax:
```yaml theme={null}
agents:
- name: "support_agent"
agent_type: "llm_agent"
prompt_config:
system_prompt: "{{ prompts.my_support_prompt }}"
```
Or use the **+** button in Playground to insert prompts directly into your YAML.
**Advanced prompt features**: For YAML syntax, template variables, and dynamic prompts, see the [Prompt Configuration](/documentation/agent_config/types_config/prompt-configuration) reference.
## Organizing Your Prompts
### Create Categories
Organize prompts by use case:
* **Customer Support**: Ticket handling, FAQ responses
* **Data Extraction**: Resume parsing, invoice processing
* **Content Generation**: Blog posts, marketing copy
* **Code Review**: Quality checks, security analysis
* **Analysis**: Sentiment, classification, moderation
### Category Management
**Add Category**: Click the button in categories sidebar
**Edit Category**: Click edit next to category name
**Delete Category**: Prompts move to "Uncategorized"
## Writing Effective Prompts
### Be Specific
**Bad example:**
```
You are a helpful assistant.
```
**Good example:**
```
You are a customer support agent for SaaS billing.
Provide clear responses including:
- Account status
- Next steps
- Resolution timeline
```
### Include Examples
Show expected output format:
```
Extract contact info from text.
Example:
Input: "John Smith at john@email.com, 555-1234"
Output: {"name": "John Smith", "email": "john@email.com", "phone": "555-1234"}
```
### Set Boundaries
```
You are a technical support agent.
Rules:
- Never make up information
- Never share credentials
- Escalate if uncertain
```
## Managing Prompts
### Edit a Prompt
1. Select prompt from the list
2. Make changes in the editor
3. Click **Save**
### Delete a Prompt
1. Select the prompt
2. Click **Delete** button
3. Confirm deletion
Deleting a prompt cannot be undone
### Reuse Across Agents
Once saved, prompts can be:
* Inserted into multiple agents
* Updated in one place
* Versioned and tracked
## Example Prompts to Create
### Customer Support Classifier
```
Classify support tickets as: technical, billing, or general.
Provide category and priority (low/medium/high).
```
### Resume Parser
```
Extract: name, email, phone, years of experience, skills, education.
Format as JSON.
```
### Content Moderator
```
Review content for policy violations.
Return: safe/questionable/unsafe with reasoning.
```
### Code Reviewer
```
Review code for:
- Best practices
- Security issues
- Performance problems
Provide specific suggestions.
```
## Tips for Building Your Library
**Start with common tasks**: Create prompts for tasks you do repeatedly
**Use descriptive names**: "Support Ticket Classifier" not "Prompt 1"
**Add context in categories**: Group related prompts together
**Iterate and improve**: Update prompts based on agent performance
## What's Next?
YAML syntax, template variables, and advanced features
Test your prompts in the Playground
## Creating Your First Prompt
Click **Add Category** in the categories sidebar
Give it a name like "Customer Support" or "Data Extraction"
Click **New Prompt** button at the top
This creates a new prompt in the selected category
In the editor panel:
* Give it a descriptive name
* Write the prompt text
* Add any notes or examples
Click **Save** to add it to your library
## Using Prompts in Your Agents
Reference saved prompts in your agent YAML using template variable syntax:
```yaml theme={null}
agents:
- name: "support_agent"
agent_type: "llm_agent"
prompt_config:
system_prompt: "{{ prompts.my_support_prompt }}"
```
Or use the **+** button in Playground to insert prompts directly into your YAML.
**Advanced prompt features**: For YAML syntax, template variables, and dynamic prompts, see the [Prompt Configuration](/documentation/agent_config/types_config/prompt-configuration) reference.
## Organizing Your Prompts
### Create Categories
Organize prompts by use case:
* **Customer Support**: Ticket handling, FAQ responses
* **Data Extraction**: Resume parsing, invoice processing
* **Content Generation**: Blog posts, marketing copy
* **Code Review**: Quality checks, security analysis
* **Analysis**: Sentiment, classification, moderation
### Category Management
**Add Category**: Click the button in categories sidebar
**Edit Category**: Click edit next to category name
**Delete Category**: Prompts move to "Uncategorized"
## Writing Effective Prompts
### Be Specific
**Bad example:**
```
You are a helpful assistant.
```
**Good example:**
```
You are a customer support agent for SaaS billing.
Provide clear responses including:
- Account status
- Next steps
- Resolution timeline
```
### Include Examples
Show expected output format:
```
Extract contact info from text.
Example:
Input: "John Smith at john@email.com, 555-1234"
Output: {"name": "John Smith", "email": "john@email.com", "phone": "555-1234"}
```
### Set Boundaries
```
You are a technical support agent.
Rules:
- Never make up information
- Never share credentials
- Escalate if uncertain
```
## Managing Prompts
### Edit a Prompt
1. Select prompt from the list
2. Make changes in the editor
3. Click **Save**
### Delete a Prompt
1. Select the prompt
2. Click **Delete** button
3. Confirm deletion
Deleting a prompt cannot be undone
### Reuse Across Agents
Once saved, prompts can be:
* Inserted into multiple agents
* Updated in one place
* Versioned and tracked
## Example Prompts to Create
### Customer Support Classifier
```
Classify support tickets as: technical, billing, or general.
Provide category and priority (low/medium/high).
```
### Resume Parser
```
Extract: name, email, phone, years of experience, skills, education.
Format as JSON.
```
### Content Moderator
```
Review content for policy violations.
Return: safe/questionable/unsafe with reasoning.
```
### Code Reviewer
```
Review code for:
- Best practices
- Security issues
- Performance problems
Provide specific suggestions.
```
## Tips for Building Your Library
**Start with common tasks**: Create prompts for tasks you do repeatedly
**Use descriptive names**: "Support Ticket Classifier" not "Prompt 1"
**Add context in categories**: Group related prompts together
**Iterate and improve**: Update prompts based on agent performance
## What's Next?
YAML syntax, template variables, and advanced features
Test your prompts in the Playground