> ## Documentation Index
> Fetch the complete documentation index at: https://docs.artaios.ai/llms.txt
> Use this file to discover all available pages before exploring further.
# Playground
> Build, test, and refine your agents in real-time
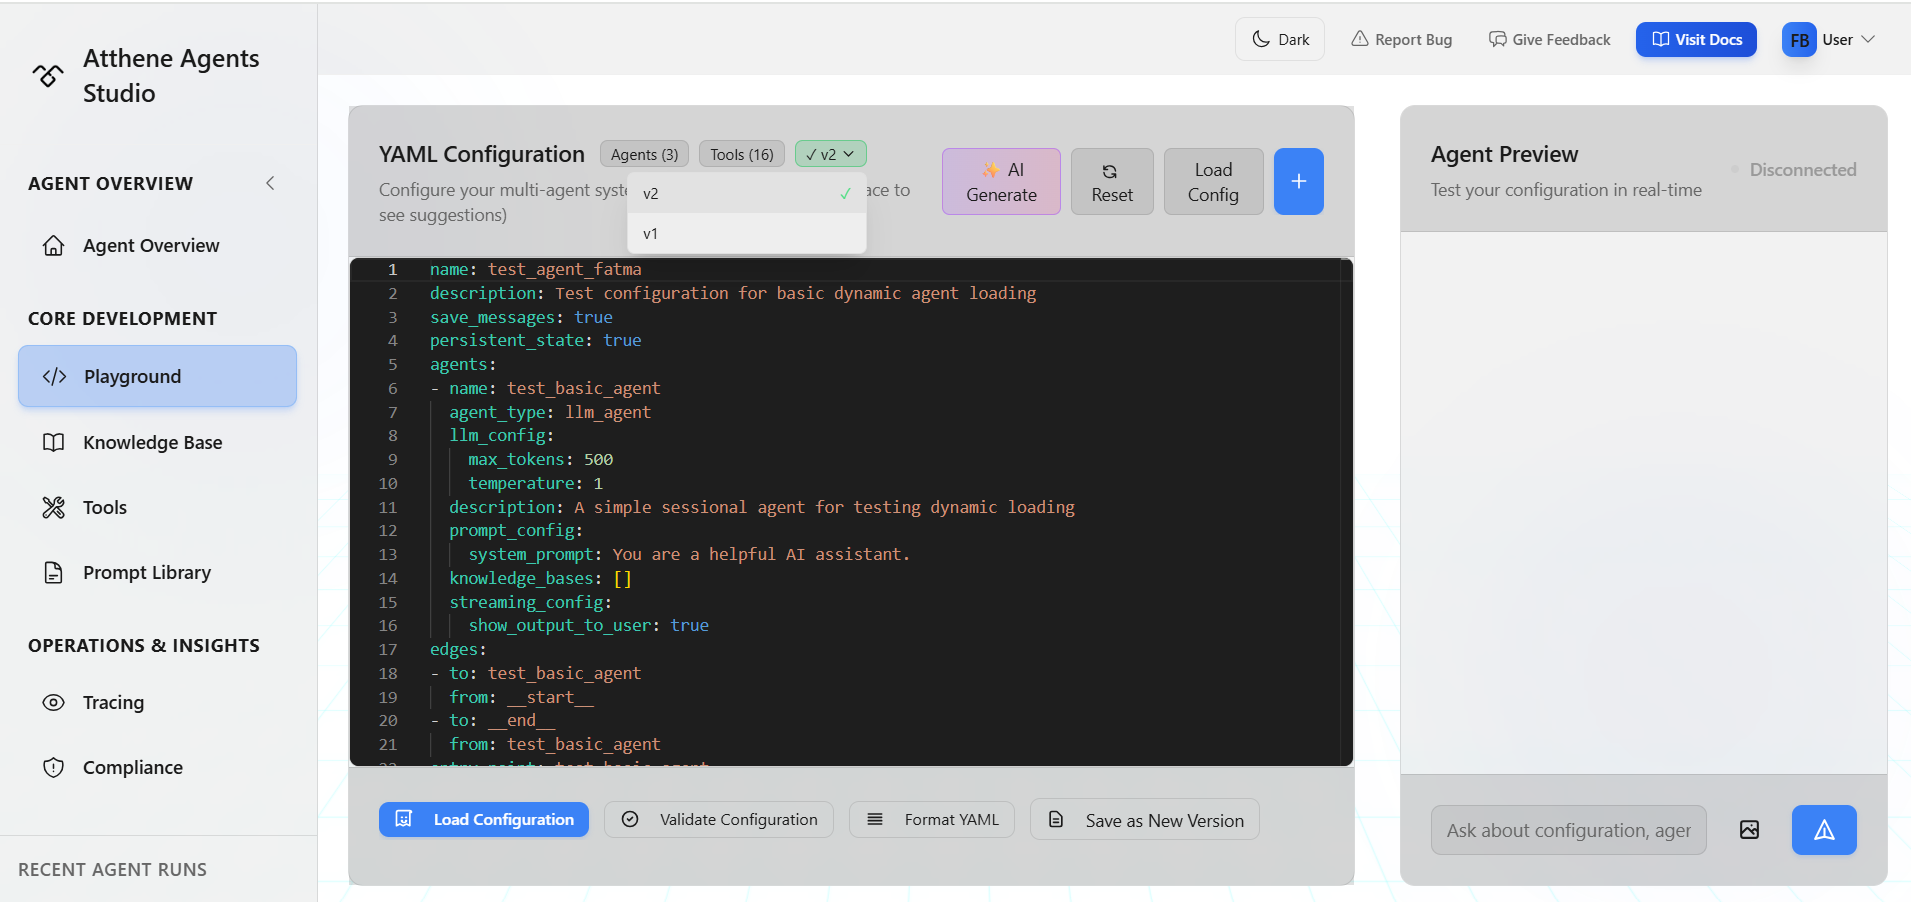
The Playground is where you create and test agents. It's split into two main areas: the YAML editor on the left and the chat interface on the right.
 ## Interface Overview
### Left Side: YAML Editor
This is where you write your agent configuration. You'll see:
* **Agents count badge**: Shows how many agents are in your config
* **Tools count badge**: Shows which tools are configured
* **Version dropdown**: Switch between saved versions (when editing an agent)
* **Toolbar buttons**: Load Config, Save Agent, Generate Config
**Learning YAML syntax?** See the [YAML Configuration](/documentation/yaml-configuration) guide for complete syntax reference
### Right Side: Agent Preview
Test your agent here:
* **Connection status**: Shows if your config is loaded
* **Chat interface**: Send messages to test your agent
* **Streaming responses**: See agent responses in real-time
## Building Your First Agent
Click **Load Config** in the toolbar
## Interface Overview
### Left Side: YAML Editor
This is where you write your agent configuration. You'll see:
* **Agents count badge**: Shows how many agents are in your config
* **Tools count badge**: Shows which tools are configured
* **Version dropdown**: Switch between saved versions (when editing an agent)
* **Toolbar buttons**: Load Config, Save Agent, Generate Config
**Learning YAML syntax?** See the [YAML Configuration](/documentation/yaml-configuration) guide for complete syntax reference
### Right Side: Agent Preview
Test your agent here:
* **Connection status**: Shows if your config is loaded
* **Chat interface**: Send messages to test your agent
* **Streaming responses**: See agent responses in real-time
## Building Your First Agent
Click **Load Config** in the toolbar
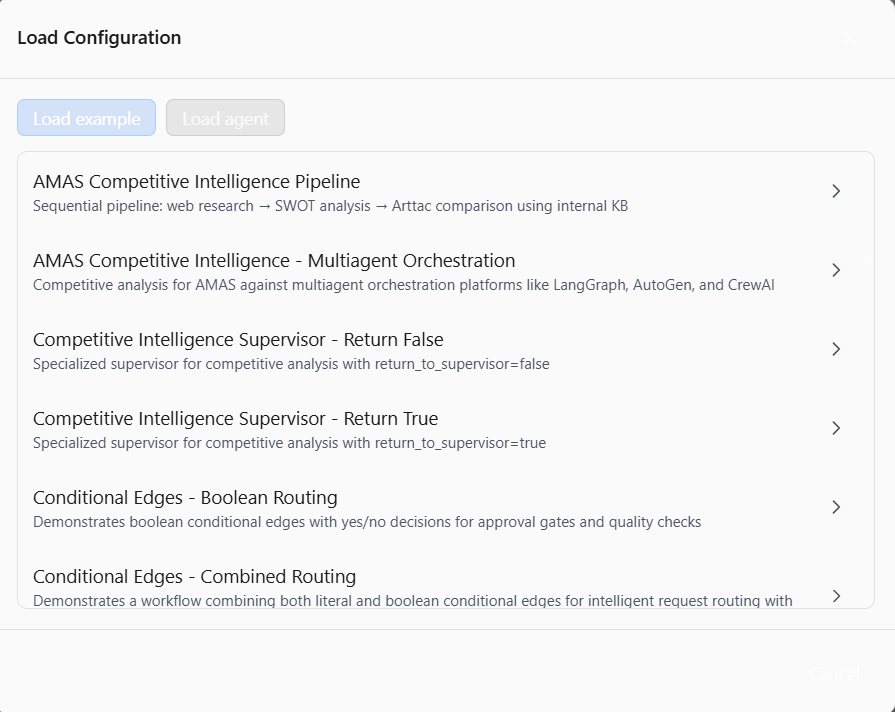 Select **"Basic Dynamic Agent Test"** to get a simple working agent
After selecting a template, click **Load Configuration**
Wait for the connection status to show "Connected" in green
Type a message in the chat interface on the right
Your agent will respond using the configuration you loaded
Edit the YAML on the left side. Try changing:
* `system_prompt`: Change how the agent behaves
* `temperature`: Adjust creativity (0.0 = focused, 1.0 = creative)
* `max_tokens`: Control response length
**Want to understand all configuration options?** Check:
* [Agent Types](/documentation/agent_config/types_config/agent-types) - Different agent architectures
* [Model Selection](/documentation/agent_config/types_config/model-selection) - LLM configuration
* [Prompt Configuration](/documentation/agent_config/types_config/prompt-configuration) - System prompts and templates
Click **Load Configuration** again to apply your changes
Test with the same message to see the difference
## Using the AI Config Generator
Don't want to write YAML from scratch? Use the AI generator.
Click **✨ Generate Config** in the toolbar
Select **"Basic Dynamic Agent Test"** to get a simple working agent
After selecting a template, click **Load Configuration**
Wait for the connection status to show "Connected" in green
Type a message in the chat interface on the right
Your agent will respond using the configuration you loaded
Edit the YAML on the left side. Try changing:
* `system_prompt`: Change how the agent behaves
* `temperature`: Adjust creativity (0.0 = focused, 1.0 = creative)
* `max_tokens`: Control response length
**Want to understand all configuration options?** Check:
* [Agent Types](/documentation/agent_config/types_config/agent-types) - Different agent architectures
* [Model Selection](/documentation/agent_config/types_config/model-selection) - LLM configuration
* [Prompt Configuration](/documentation/agent_config/types_config/prompt-configuration) - System prompts and templates
Click **Load Configuration** again to apply your changes
Test with the same message to see the difference
## Using the AI Config Generator
Don't want to write YAML from scratch? Use the AI generator.
Click **✨ Generate Config** in the toolbar
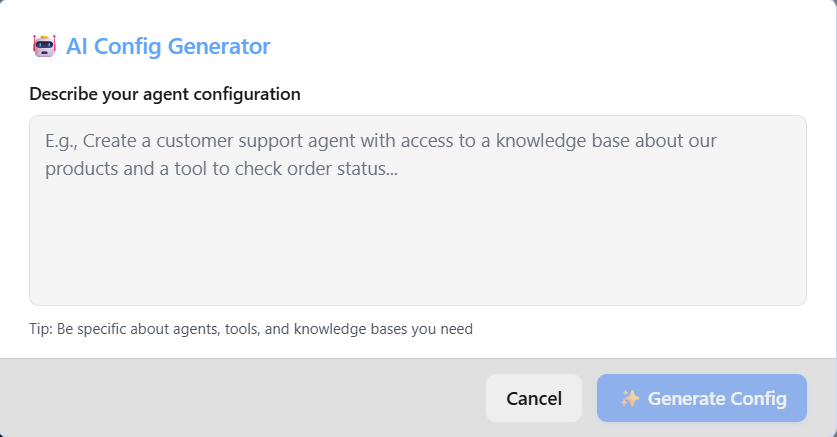 Type what you want your agent to do. For example:
```
Extract name, email, and phone number from business cards and meeting notes
```
Be specific about what data you need and what the agent should do
Click **Generate Config** and wait a few seconds
Type what you want your agent to do. For example:
```
Extract name, email, and phone number from business cards and meeting notes
```
Be specific about what data you need and what the agent should do
Click **Generate Config** and wait a few seconds
 The AI will create a complete YAML configuration
The generated YAML appears in your editor
Review it, then click **Load Configuration** to test it
**Need help writing descriptions?** Check out the [AI Config Generator guide](/documentation/advanced/ai-config-generator) for tips and examples
## Adding Tools and Prompts
Click the **+** button in the toolbar to quickly insert configurations:
The AI will create a complete YAML configuration
The generated YAML appears in your editor
Review it, then click **Load Configuration** to test it
**Need help writing descriptions?** Check out the [AI Config Generator guide](/documentation/advanced/ai-config-generator) for tips and examples
## Adding Tools and Prompts
Click the **+** button in the toolbar to quickly insert configurations:
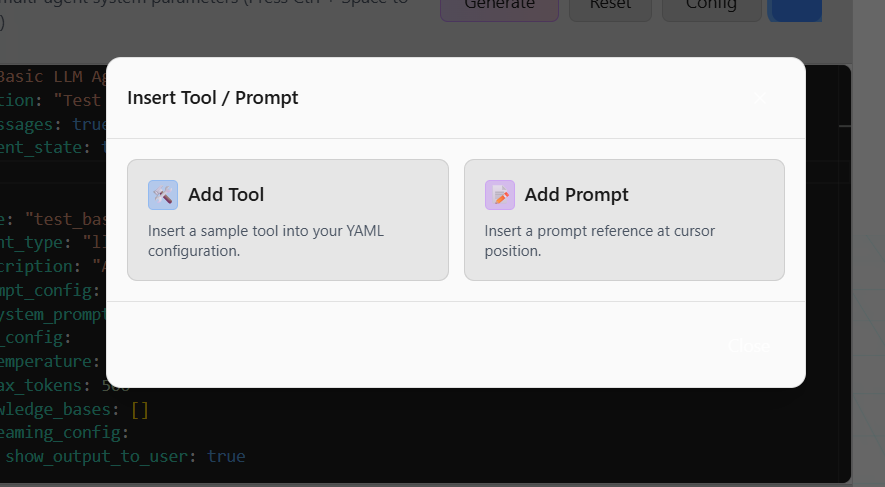 ### Insert Tool
Adds a sample tool configuration at your cursor position
**→ [Tools Configuration](/documentation/studio/tools)** - Available tools and setup
### Insert Prompt
Inserts a prompt reference from your prompt library
**→ [Prompt Configuration](/documentation/agent_config/types_config/prompt-configuration)** - Advanced prompt features and variables
To add knowledge bases to your agent, manually configure them in the YAML. See the [Knowledge Base Setup](/documentation/agent_config/knowledge-base-setup) guide for YAML syntax.
This helps you quickly add tools and prompts without typing them manually.
## Saving Your Agent
Once you're happy with your agent:
This opens a dialog to name your agent
Choose a clear, descriptive name like "Resume Parser" or "Support Ticket Router"
Your agent is now saved and appears in **Agent Overview**
Saved agents can be accessed via API, deployed as chatbots, or further refined
## Working with Versions
When you save changes to an existing agent, it creates a new version. The version dropdown appears in the Playground toolbar when editing an agent:
### Version Controls
**Green checkmark (✓)**: Current version (deployed and active)
**Yellow scroll (📜)**: Historical version (viewing only)
### Switching Versions
1. Click the version dropdown in the toolbar
2. Select a version to view
3. To make it active, go to **Agent Overview** → **Settings** → **Versions** → **Deploy**
When viewing a historical version, you're in read-only mode. Any changes will create a new version when saved
## Tips for Effective Testing
**Test edge cases**: Try unusual inputs, very long messages, and questions your agent shouldn't answer
**Use the Load Config button**: After every YAML change, click "Load Configuration" to apply changes. The chat won't update automatically
**Watch the badges**: The Agents and Tools badges show what's configured. Hover to see names
**Start simple**: Get a basic agent working first, then add complexity (knowledge bases, tools, structured output)
## Common Issues
**"Connection failed"**: Your YAML has errors. Check for typos, missing colons, or incorrect indentation
**"Agent not responding"**: Make sure you clicked "Load Configuration" after making changes
**YAML indent errors**: Use 2 spaces for indentation, not tabs. Be consistent with spacing
## What's Next?
Complete YAML syntax reference
LLM agents, ReAct agents, and workflows
Configure RAG and retrieval settings
Extract structured data from agents
### Insert Tool
Adds a sample tool configuration at your cursor position
**→ [Tools Configuration](/documentation/studio/tools)** - Available tools and setup
### Insert Prompt
Inserts a prompt reference from your prompt library
**→ [Prompt Configuration](/documentation/agent_config/types_config/prompt-configuration)** - Advanced prompt features and variables
To add knowledge bases to your agent, manually configure them in the YAML. See the [Knowledge Base Setup](/documentation/agent_config/knowledge-base-setup) guide for YAML syntax.
This helps you quickly add tools and prompts without typing them manually.
## Saving Your Agent
Once you're happy with your agent:
This opens a dialog to name your agent
Choose a clear, descriptive name like "Resume Parser" or "Support Ticket Router"
Your agent is now saved and appears in **Agent Overview**
Saved agents can be accessed via API, deployed as chatbots, or further refined
## Working with Versions
When you save changes to an existing agent, it creates a new version. The version dropdown appears in the Playground toolbar when editing an agent:
### Version Controls
**Green checkmark (✓)**: Current version (deployed and active)
**Yellow scroll (📜)**: Historical version (viewing only)
### Switching Versions
1. Click the version dropdown in the toolbar
2. Select a version to view
3. To make it active, go to **Agent Overview** → **Settings** → **Versions** → **Deploy**
When viewing a historical version, you're in read-only mode. Any changes will create a new version when saved
## Tips for Effective Testing
**Test edge cases**: Try unusual inputs, very long messages, and questions your agent shouldn't answer
**Use the Load Config button**: After every YAML change, click "Load Configuration" to apply changes. The chat won't update automatically
**Watch the badges**: The Agents and Tools badges show what's configured. Hover to see names
**Start simple**: Get a basic agent working first, then add complexity (knowledge bases, tools, structured output)
## Common Issues
**"Connection failed"**: Your YAML has errors. Check for typos, missing colons, or incorrect indentation
**"Agent not responding"**: Make sure you clicked "Load Configuration" after making changes
**YAML indent errors**: Use 2 spaces for indentation, not tabs. Be consistent with spacing
## What's Next?
Complete YAML syntax reference
LLM agents, ReAct agents, and workflows
Configure RAG and retrieval settings
Extract structured data from agents